Hello Cocktail
Before reading this document, Minic should be installed on your PC. If you didn’t install Minic, please take a look at the Installing Cocktail Mini.
Minic is a tool that runs the Cocktail Cloud(mini version) on your PC. You can experience various features of the Cocktail Cloud with Minic.
This document contains a brief demo of deploying container to Cocktail Cloud. The flollowing steps describe how to get started.
Starting Minic
- Run the
minic startcommand.$ minic start Kubernetes cluster started.(8s) Checking inspector...| - When all pods are running(green status), type “o” to run Cocktail Cloud on your browser.
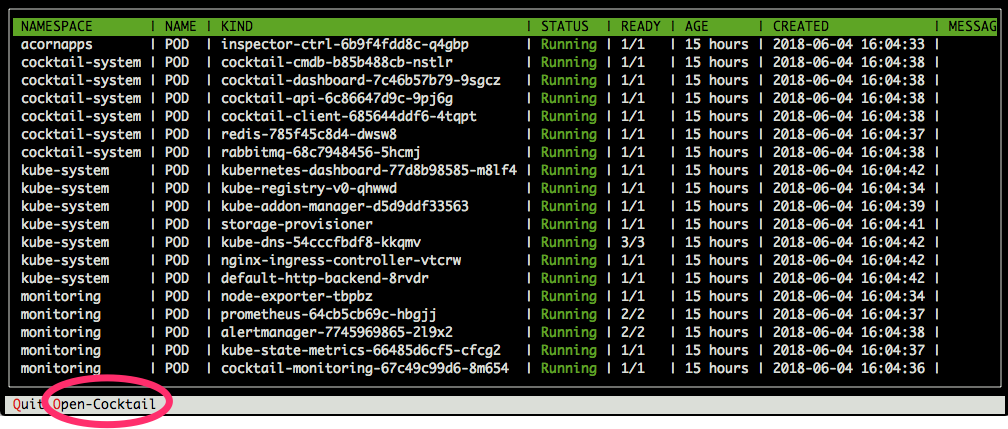 The status screen on your console(above image) shows the status of all pods that are running on local Kubernetes cluste(minic cluster). To exit the status screen, type “q” on your keyboard. You can see the screen by running
 minic statuscommand at anytime you want.
Log in to Cocktail Mini
- At the Cocktail Mini’s login screen, select role and input user id, password.
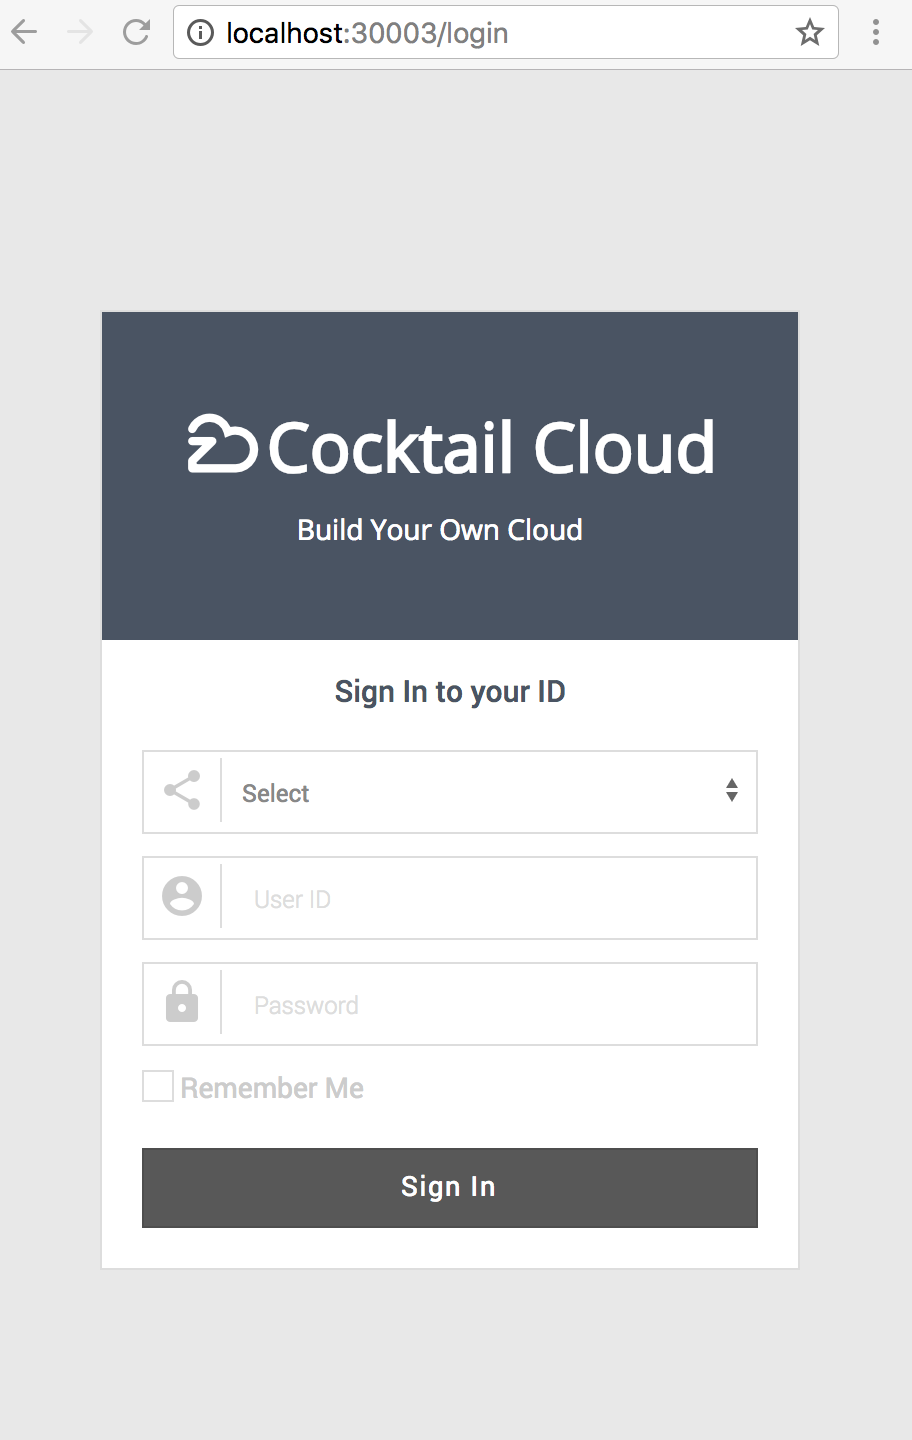
The default user informations are as follows.- Role : Admin
- User Id : admin@acornsoft.io
- Password : Admin0000
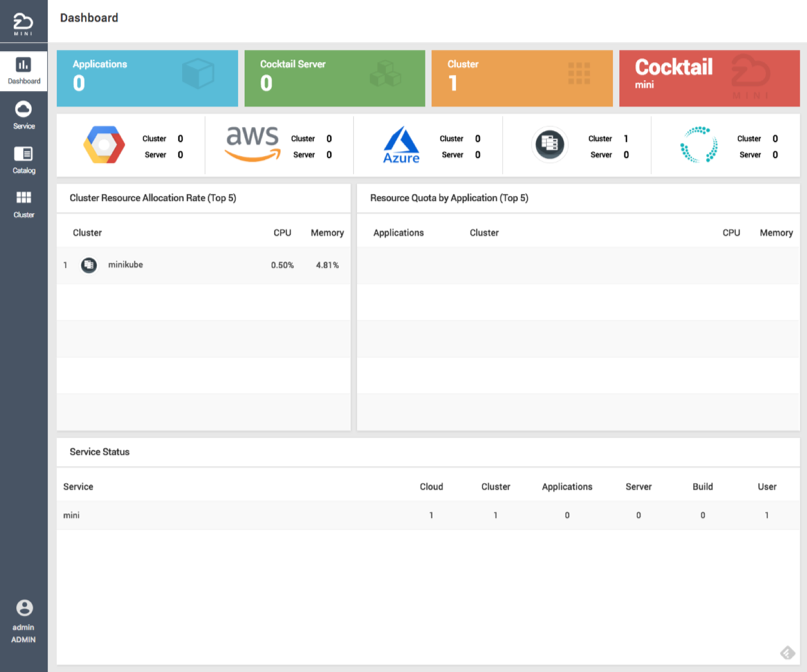
- Click “Sign in” button. You can see the Dashboard screen.
Create Namespace
-
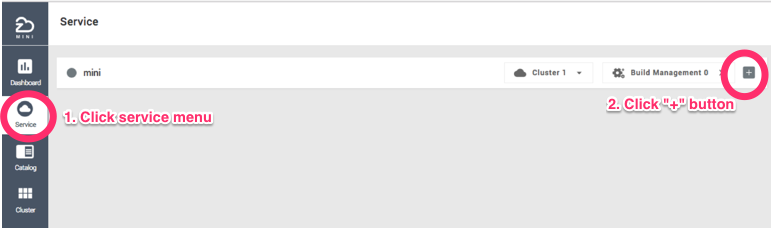
Click the Service menu on left side. To create the namespace, click the “+” button.
- On the dialog box, input the namespace information that you want create. And then click the Create button.
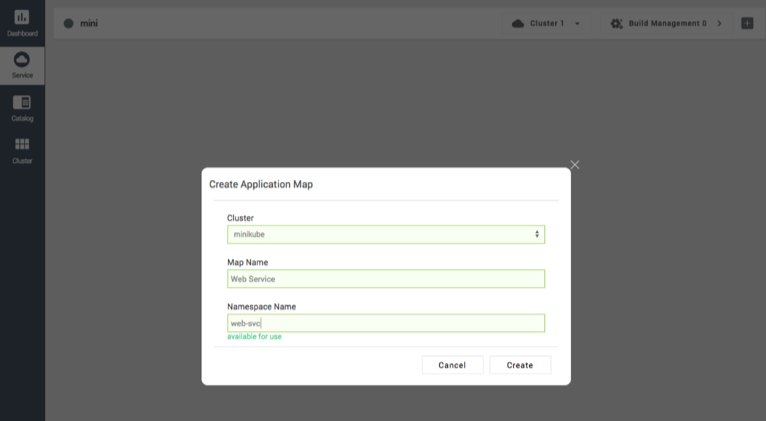 For example.
- Cluster : Select “minikube”
- Map Name : “Web Service”
- Namespace Name : web-svc
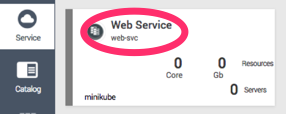
- You can see the “Web Service” namespace on the screen.

Create Server
In the Cocktail Cloud, Server is a package that is consist of Kubernetes objects. Cocktail Cloud manges life cycle and monitoring of the server.
-
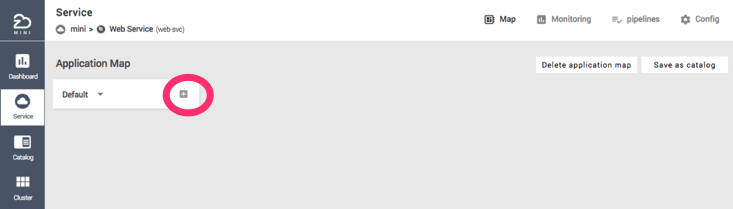
Click the name of namespace. And Click the Default group’s “+” button on the namespace(Application Map) screen.
- Input server basic information.
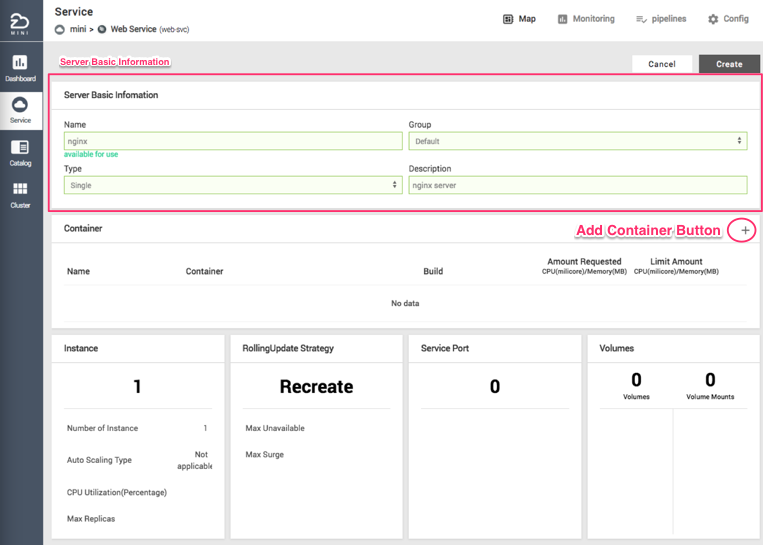 For example.
- Name : nginx
- Group : Default
- Type : Single
- Description : nginx server
-
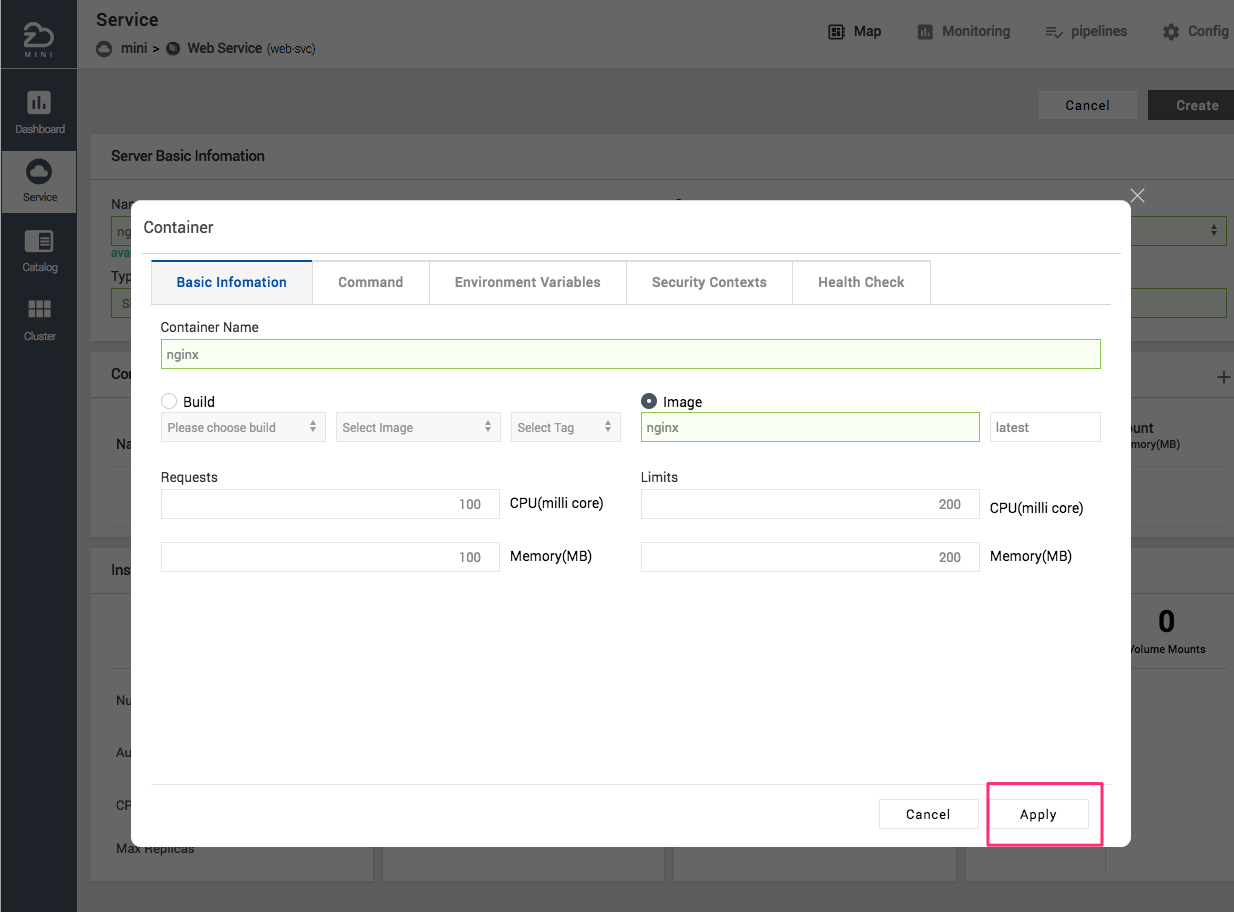
Click the “+” button to add container(see the above image). Add container information to run.(see below image). And then click the Apply button to save.
-
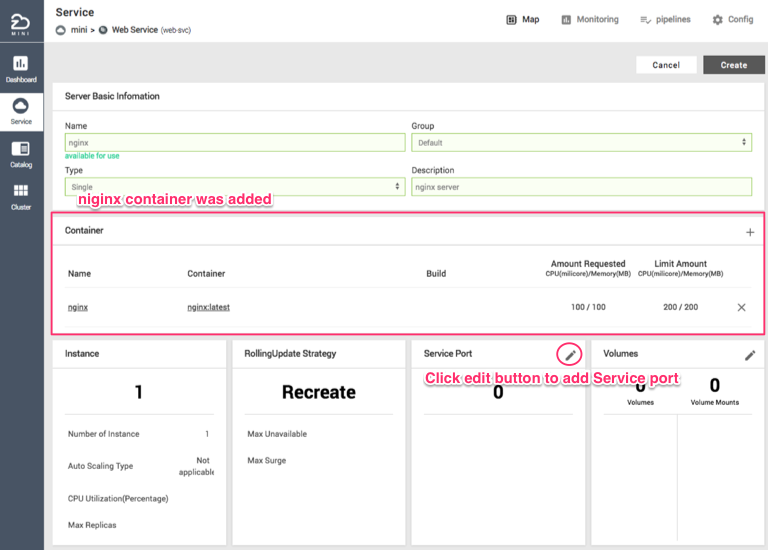
The nginx container was added. To add Service port, click the edit button.
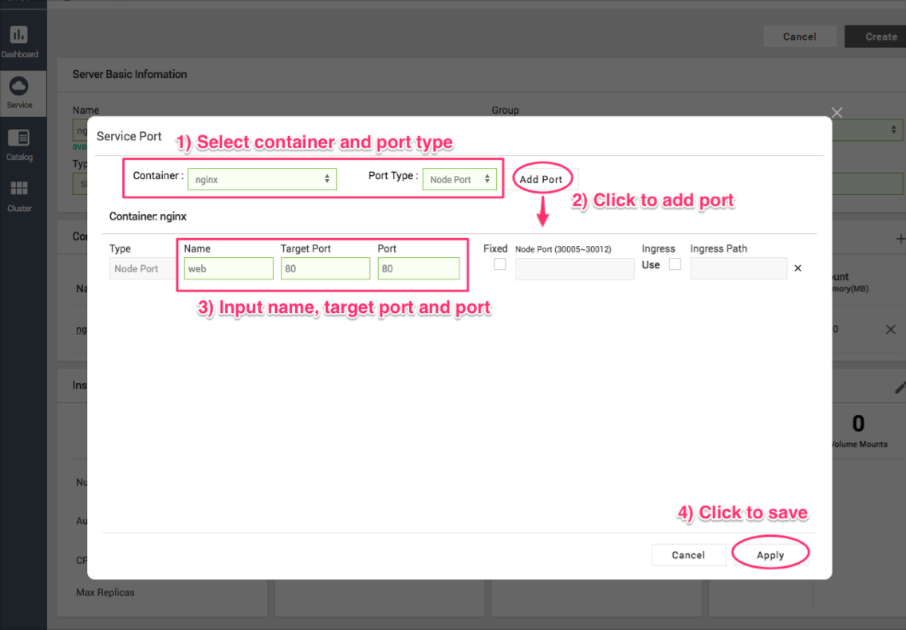
- In the Service port’s input dialog, add port as following image.
 For example.
- Container : Select “nginx”
- Port Type : Select “Node Port”.
- (Click the “Add Port button”)
- Name : “web”
- Target Port (Container port) : 80
- Port (Service Port) : 80
Deploy Server
-
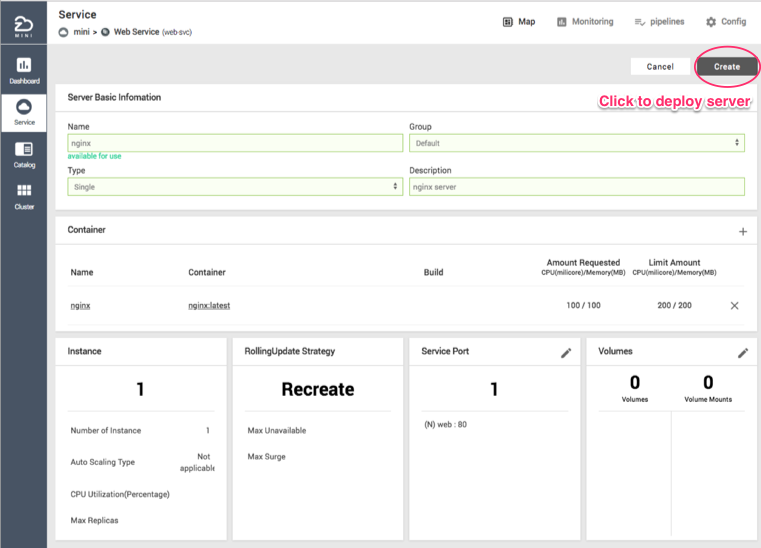
Everything is ready to deploy the “nginx” server. To create server, click the “Create” button.
-
After a while, you can see the nginx server running. Click the server address link to open the home page of nginx.
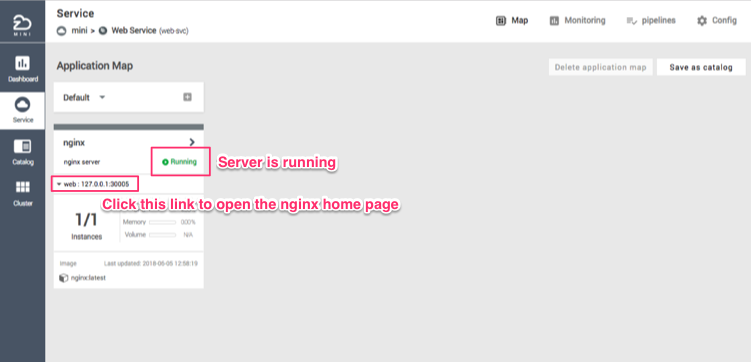
(On your browser…)